Knitting Pattern: A Cabled Book Sleeve
I designed a knitting pattern! To get right into it, I wanted a way to protect my binder notebook, which is very pretty but made of the most ridiculously scratch-prone leather ever. It has accumulated scratches just from my nails in the course of daily handling, so putting it unprotected in a bag was unthinkable.
Inspired by the cabled coffee cup cozy I made while teaching myself how to knit cables, I decided to try my hand at drafting a pattern for a knitted book sleeve that I could slip over the notebook like a sweater. I love the look of cables, so I picked a cable I liked from my book of stitches, did the maths and measurements, and came up with this pattern!
❦
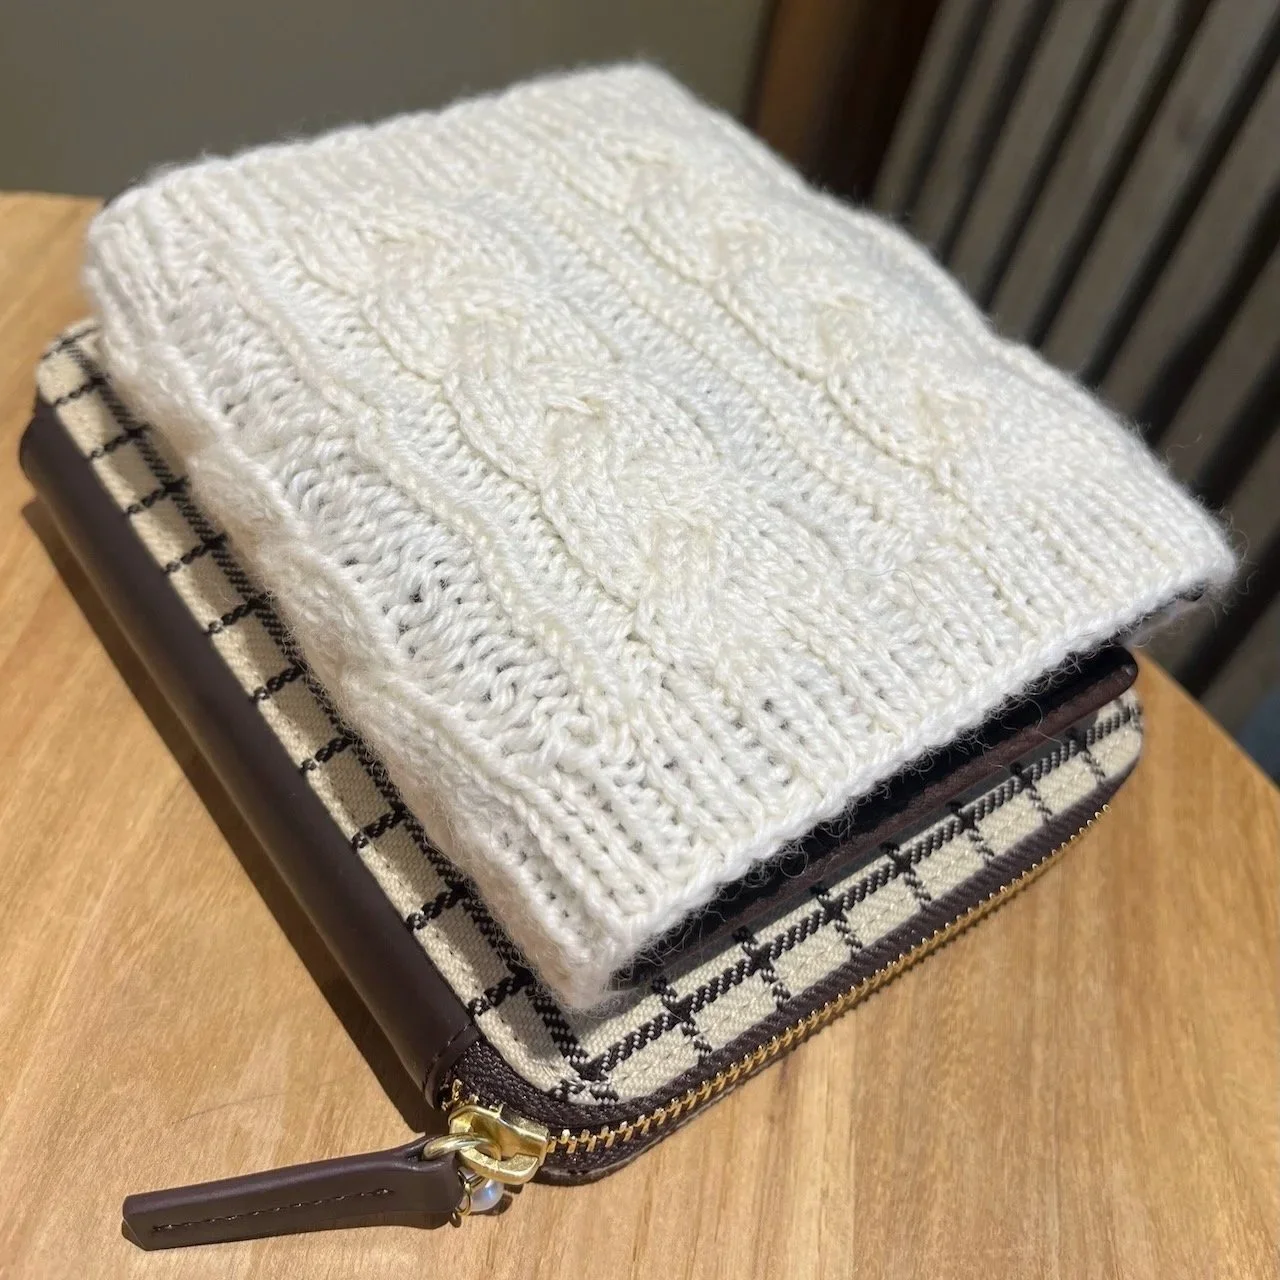
Plait & Rib Cabled Book Sleeve
Yarn: Cleckheaton Country 8 ply wool, slightly over half a skein
Needles: 15cm long double pointed needles in 3.25mm and 3.5mm
Gauge: 22 stitches to 10cm on larger needles in stockinette stitch, knitted flat
Instructions:
1. Cast 60 stitches onto 3 smaller needles and connect to work in the round (60)
2. [K2, P1] around for 6 rows (60)
3. With larger needles, [K4, M1L] around (75)
4. Start cable pattern for body. Repeat rows (i) to (viii) 4 times:
(i) [P2, Ktbl, P2, K9] x 5, P2, Ktbl, P2
(ii) Repeat (i)
(iii) [P2, Ktbl, P2, K3, C3Front] x 5, P2, Ktbl, P2
(iv) Repeat (i)
(v) Repeat (i)
(vi) Repeat (i)
(vii) [P2, Ktbl, P2, C3Back, K3] x 5, P2, Ktbl, P2
(viii) Repeat (i)
5. [K3, K2Tog] around (60)
6. With smaller needles, [K2, P1] around for 6 rows (60)
7. Bind off in pattern.
8. Wet block and dry flat.
Notes: This pattern fits a standard A6 sized notebook or pocket/mini 6 ring binder, but can be adapted for different sized books.
To add diameter/width, cast on more stitches in a multiple of 12sts + 3 sts.
To add height, add rounds of the 8-row cable pattern in Step 4.
❦
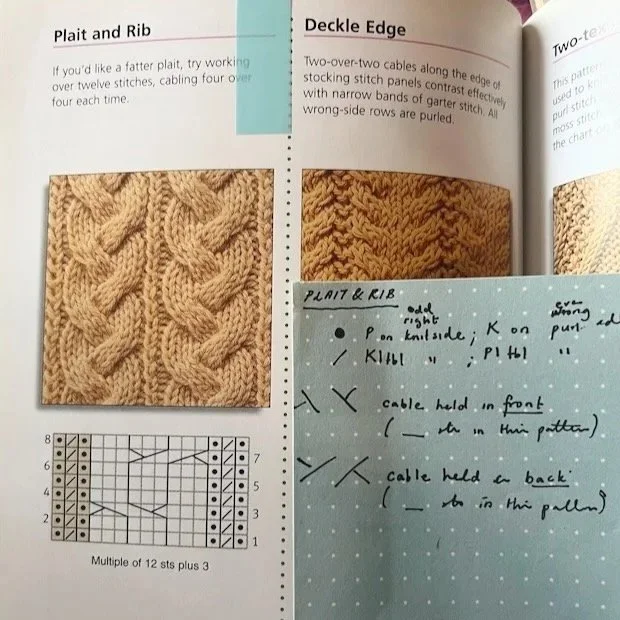
The plait and rib cable this pattern is based on , courtesy of Knitting Stitches, Mary Webb (2006).
I’m proud of all the designing and testing that went into this pattern, and how it resulted in a usable product! It feels like a milestone. And I learnt a lot, making mistakes and troubleshooting solutions, each mistake becoming one lesson, each lesson taking you one step closer to understanding what you need to achieve the qualities you want. For this design, wool and purl stitches give stretch. Cables add visual interest and padded protection, but also pull the fabric inwards, so there must be a round of increases after the ribbing to add stitches before the body cables start. Ribbed hems should knitted on smaller needles for a more uniform look. And so on.
There’s definitely still room for improvement, in both the pattern design and my knitting*. But this early into my knitting journey, I can live with imperfections. There’s a fascinating superstition/urban legend that a knitter works their soul into every piece they create, so they deliberately leave a mistake or imperfection in their knit for their soul to escape. A perfect piece traps the soul, but a flaw lets it out.
In this unfortunate time of generative AI, perfection can be a giveaway of something made by AI— you know it: that overly smooth, uninflected flat voiceover, or a technically flawless but characterless piece of writing. In contrast, a flaw—a typo, a grammatical error, a stammer, a dropped stitch—are now hallmarks of something human-made, proof of the human soul behind the creation. The imperfections let the soul out indeed.
15 September 2026
* The twisted stitch column made by knitting through the back loop) came out crooked in some rows, though it eased a bit with blocking. I might have dropped some stitches. Some of the purls between the cables look funny, and my wool yarn could maybe have been thicker or perhaps a different colour to reduce the see-through quality of white fabric. Because of the stitch distribution, there will be a section of 3+3 purl stitches in a stretch, which is not the prettiest, but works well to accommodate for the different pens you might carry on that edge of the notebook.